

This is your complete guide to setting up Google Analytics 4 (GA4).
By reading and following the directions in this article you will gain a strong understanding of:
- What Google Analytics 4 is
- Creating a new Google Analytics account and GA4 property
- Upgrading to GA4 from Universal Analytics (UA)
- Other important features – Google signals, data retention, and define internal traffic
Then you’ll be confident in setting up a Google Analytics account and GA4 property by yourself.
Let’s dive in.
What is Google Analytics 4?
Before we start learning the process of Google Analytics account and GA4 property setup, we’ll walk you through the basics of Google Analytics 4.
Google Analytics 4 or GA4 is the newest analytics platform by Google and is built off the backbone of the App + Web platform (aka Firebase).
GA4 offers some significant advantages over the previous version (Universal Analytics), including more accurate data collection and improved support for multi-platform tracking. Also, GA4 takes a different approach to data collection and reporting than what you’re used to seeing in UA.
Today, Google is pushing marketers to re-think how they interpret user data by changing to an event-based model. Data is collected and presented differently in GA4. It focuses more on the events and interactions from the users’ journey.
That’s why it’ll become the new default version of Google Analytics, as creating a new account now includes setting up both UA and GA4 properties.
How to create a new Google Analytics account and GA4 property: 7 steps
It’s time to dive into what you want to know. We’ll walk you through 7 simple and visual steps to work on setting up a new Google Analytics account and GA4 property.
1. Account setup: add your account name
The first step is to type your account name in Google Analytics. When finished, you may click “Next”
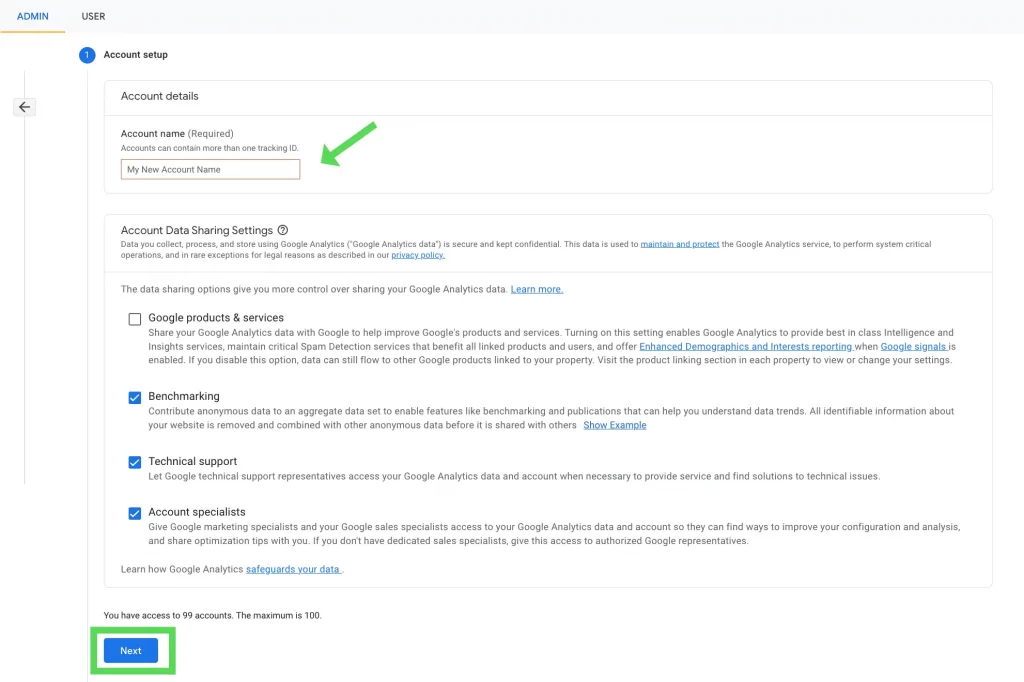
Note: You can create up to 100 accounts. You don’t need to check the box for Google products & services unless you are selling them.
2. Property setup: add your property name
You might be wondering what your property name is. A property name is often just your website’s name, but you can get creative with it too.
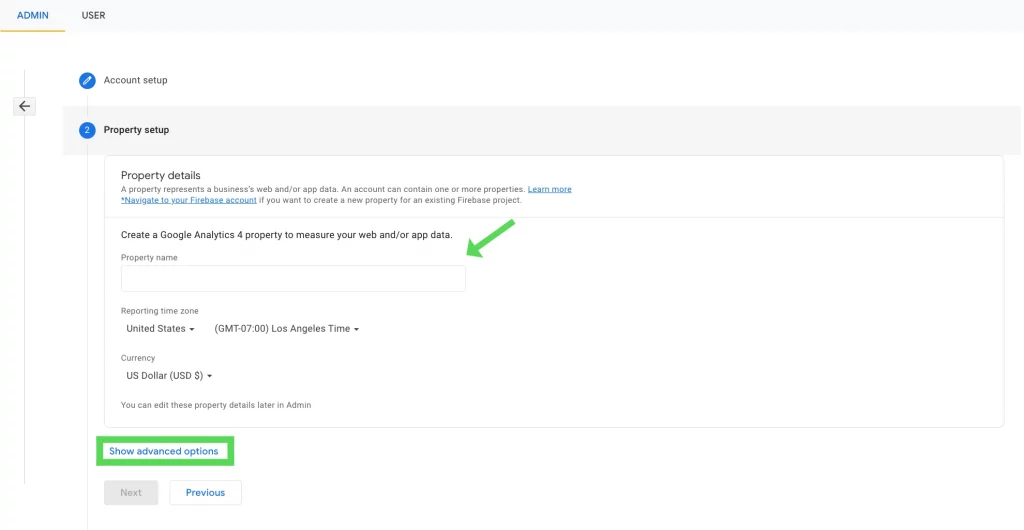
Note: You can change the reporting time zone and currency based on your country. If you want to create a UA property at the same time, click “Show advanced options”

Note: You can drag the button to the left to activate UA. However, UA will be shut down on July 2023.
3. Add your business information and click “Create”
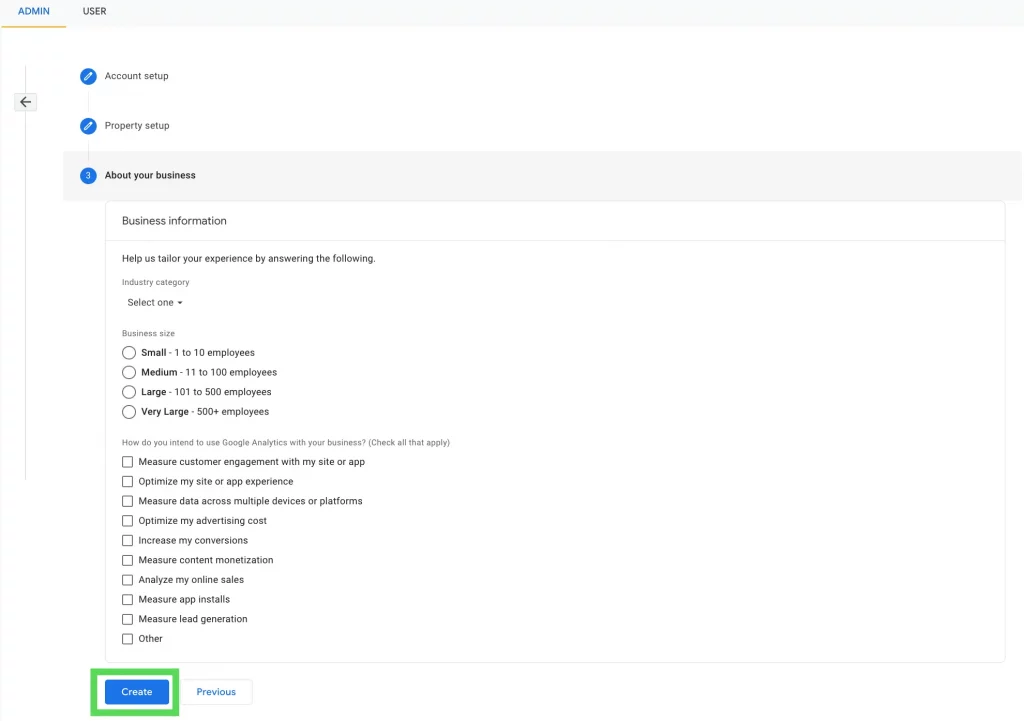
Note: If you already have your Google Analytics account set-up, you can go to Admin and within the Property tab hit “Create Property” and follow the same steps 2 and 3 that we covered above.
4. Accept Google Analytics Terms of Service Agreement
After clicking “Create” in the previous step, you will be required to accept the Google Analytics Terms of Service Agreement.
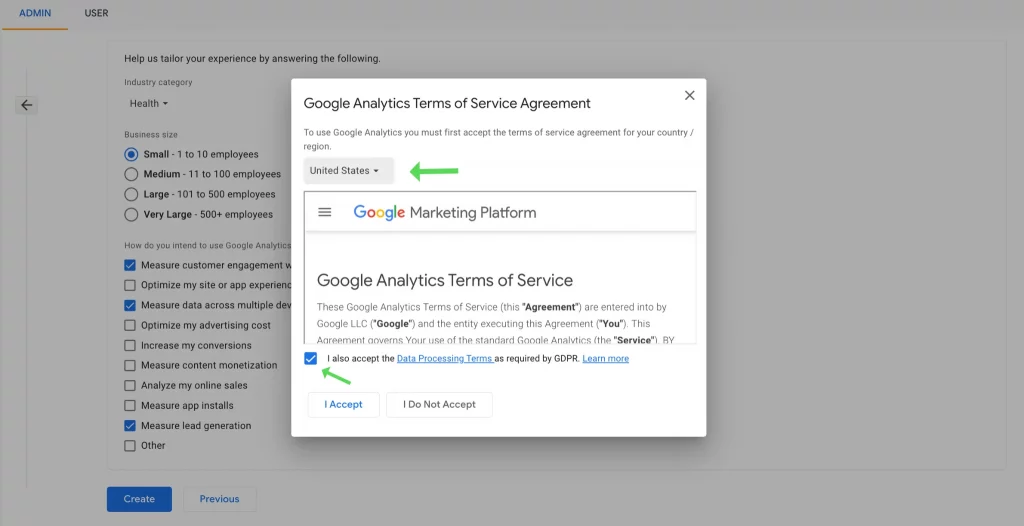
Note: Do not forget to change the location tag and switch it to your country.
5. Choose a platform you want to collect the data on
After clicking “I Accept” in the previous step, you’ll be redirected to Data Streams to start collecting data from the device you want.
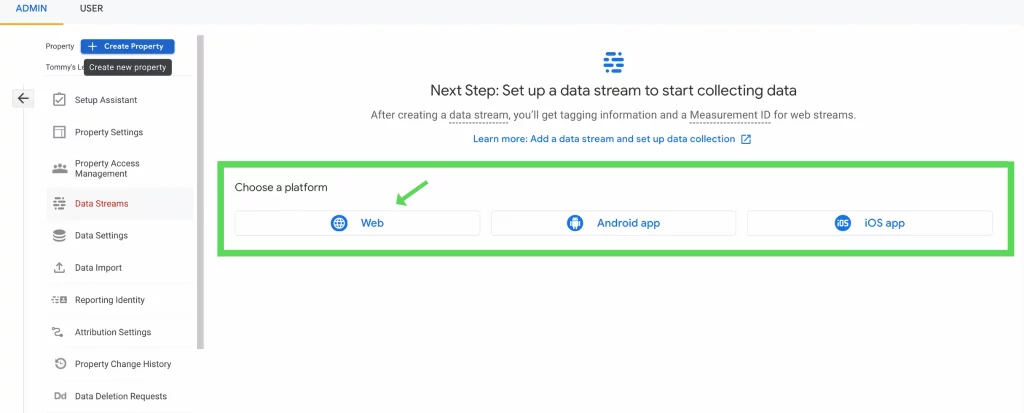
Note: In this example, we will select a website as our platform. So, the next step you’ll see is for a web stream.
6. Add your website URL and your website name under the stream name
Almost there! Adding your website URL and your website name will help GA4 understand which website traffic should be attributed to your website.

Note: You should keep the “Enhanced measurement” active to measure people’s interactions with your content. Doing this will help you upgrade to GA4 from UA.
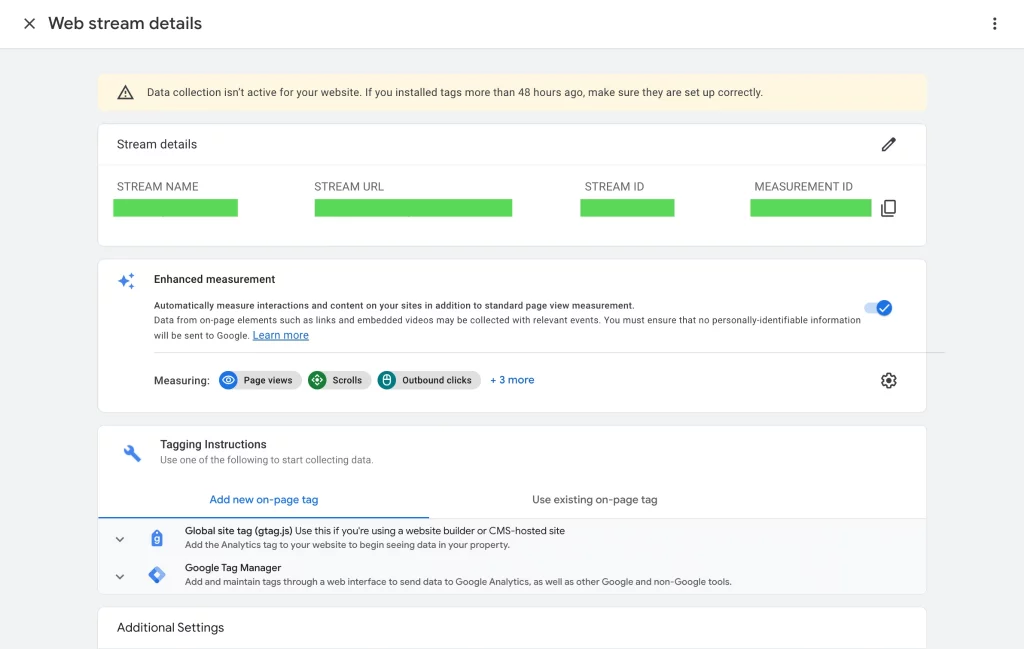
7. Find your web stream details
This is the final step to ensure your stream name, stream URL, stream ID, and measurement ID are correct. You can find it under Property >Data Streams and select a platform
How to upgrade GA4 from UA: 5 steps
If you’re still using Universal Analytics (UA), now is the time to upgrade to GA4. Here are the 5 steps.
1. Navigate to your admin settings within your GA account
Go to Admin and under Property Settings, look for “Upgrade to GA4” and hit it.
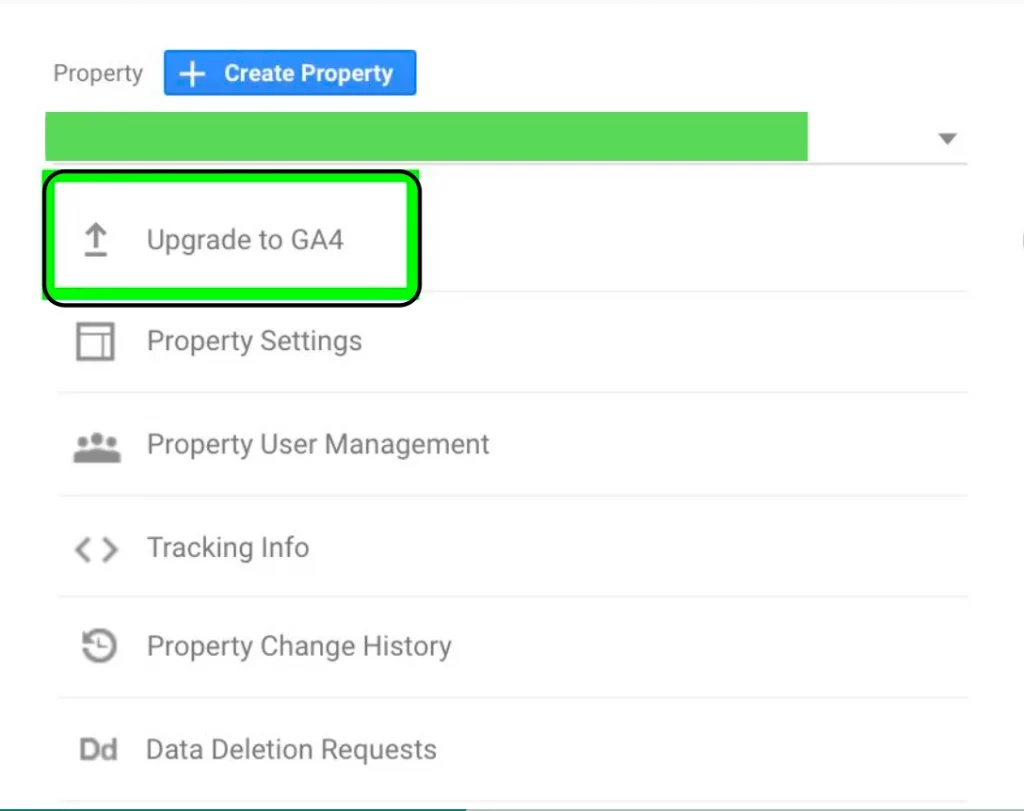
Note: If the upgrade option isn’t available to you, you can click on “Create Property” to create a new GA4 property and skip ahead to step 4 after following the Create Property Setup.
2. Begin the setup process
Click “Get Started“ to begin the setup process with Google Analytics’ setup wizard.
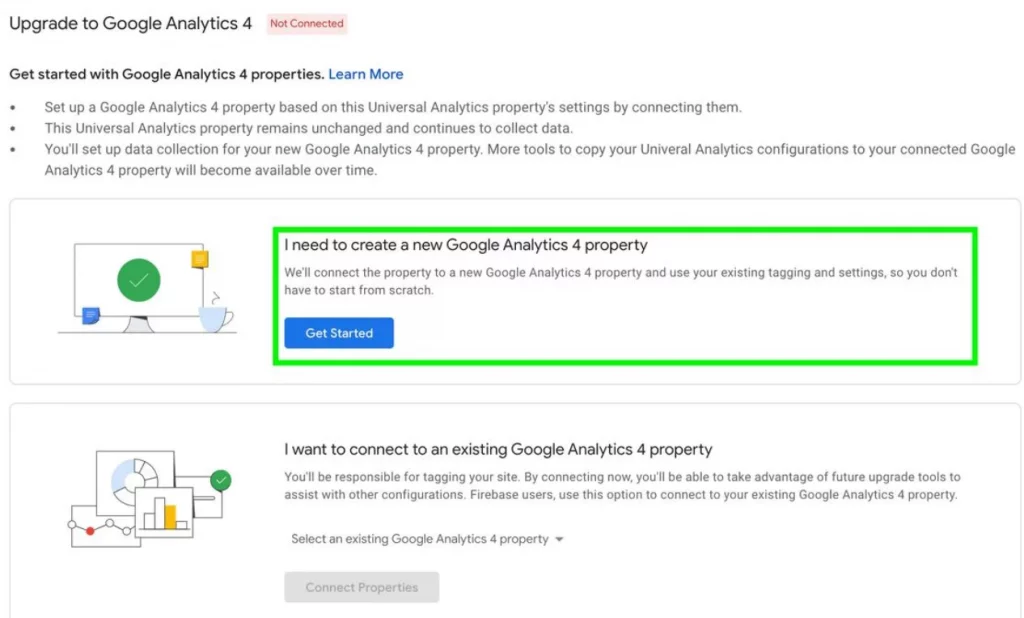
Note: You’ll have several options depending on your current GA setup. If you are using the Global Site Tag to implement UA, the wizard will enable data collection with your existing tags.
If you are not using the Global Site, you need Google Tag Manager (GTM). The setup guide to GA4 with GTM will outline how to enable data collection using Google Tag Manager.
3. Generate a measurement ID for a new GA4 property
Enter the “Tag Installation“ menu by clicking the right arrow shown below.
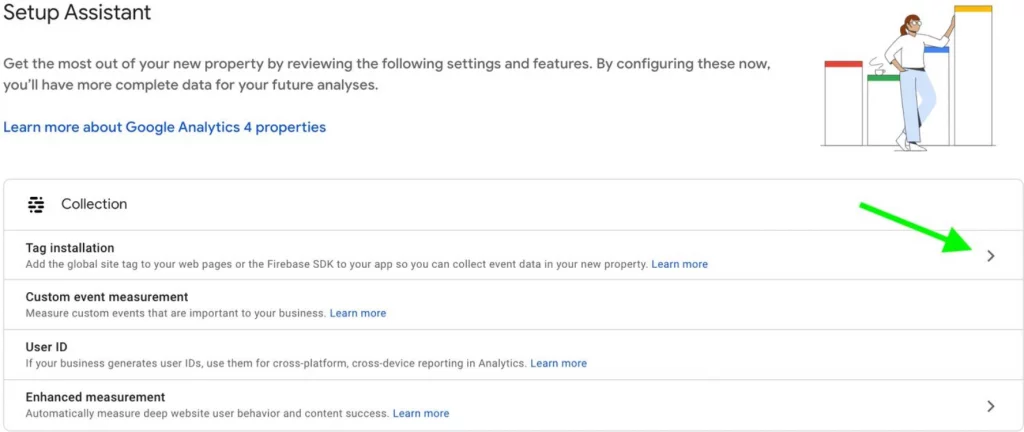
Note: To start the data collection, you will need to generate a measurement ID for your new GA4 property. The measurement ID is similar to the UA ID.
4. Add stream
Expand the Add Stream and select what you want to track. In this example, you want to track a website, so you should select Web.
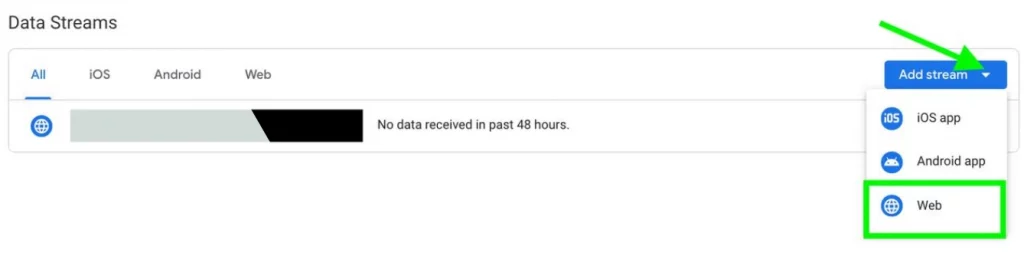
Note: GA4 doesn’t have Views like its predecessor. Instead, it has a Data Stream. The Data Stream expands beyond the Pageview request as it measures certain events automatically such as scrolls, outbound link clicks, site search, and more.
5. Configure your data stream
To configure your data stream, you need to enter your website URL and stream name (your company name). Click “Create stream“ when finished.
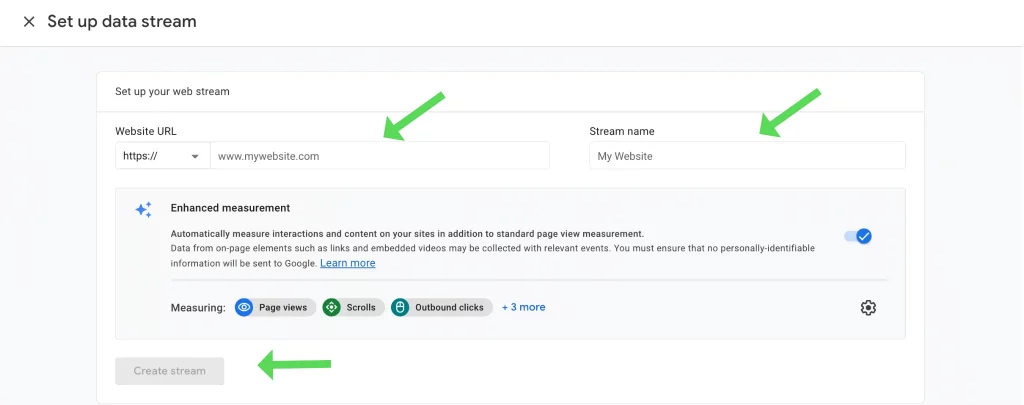
Note: You should keep the “Enhanced measurement” active.
Other important features
After you have successfully created a Google Analytics account and GA4 property, you can activate other important features in your property settings.
We’ll cover 3 of them:
- Google Signals
- Data Retention
- Define Internal Traffic
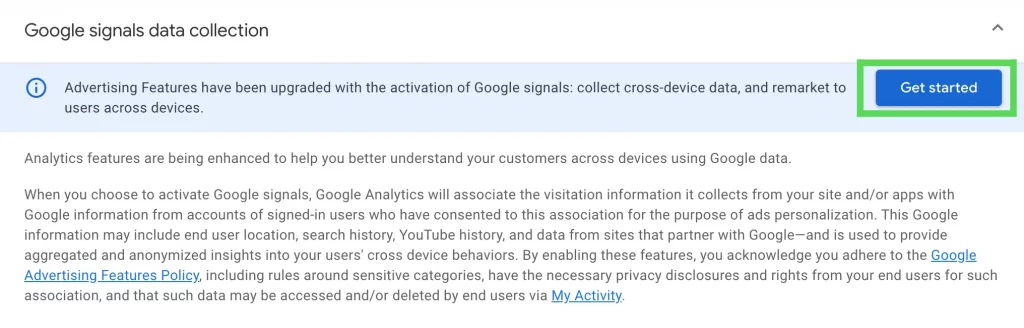
Google Signals
To get more accurate data, you will need to activate Google Signals
Let’s activate it:
- Go to Admin and under Property >Data Settings > Data Collection
- Click “Get Started” and you’ll be led to the Active Google Signals page
- Click “Continue”, and “Activate”
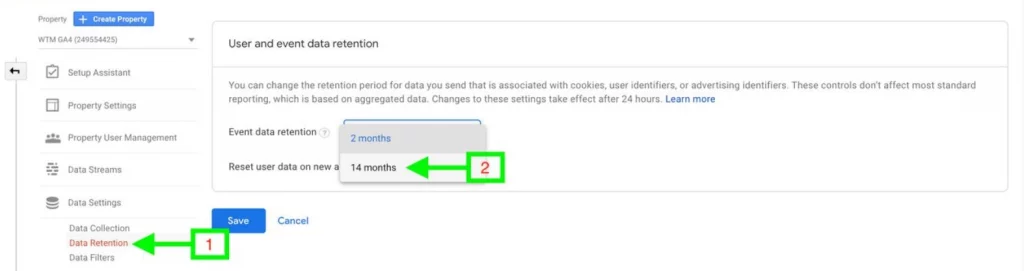
Data Retention
Like UA, there is a Data Retention setting within GA4 that lets you choose how long GA retains user and event data before automatically deleting it. We recommend bumping it up to 14 months, the maximum amount allowed.
You can find it under Property > Data Settings > Data Retention
Define Internal Traffic
In Data Settings, you’ll see another setting called Data Filters.
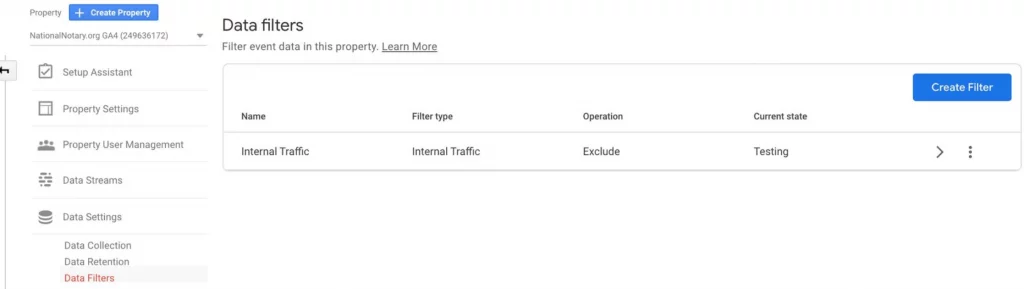
GA4 gives you the ability to filter event data in your property. By default, GA4 will automatically create a data filter to exclude internal traffic. However, it’s up to you to configure the internal traffic to be excluded. Before we dive into the settings within the data filer.
Let’s define the internal traffic:
- Navigate to Data Streams, select your stream and click “More Tagging Settings”
- Select “Define Internal traffic” and click “Create”
- In “Configuration”, enter a descriptive rule name and enter the IP address you want to exclude
- Hit save
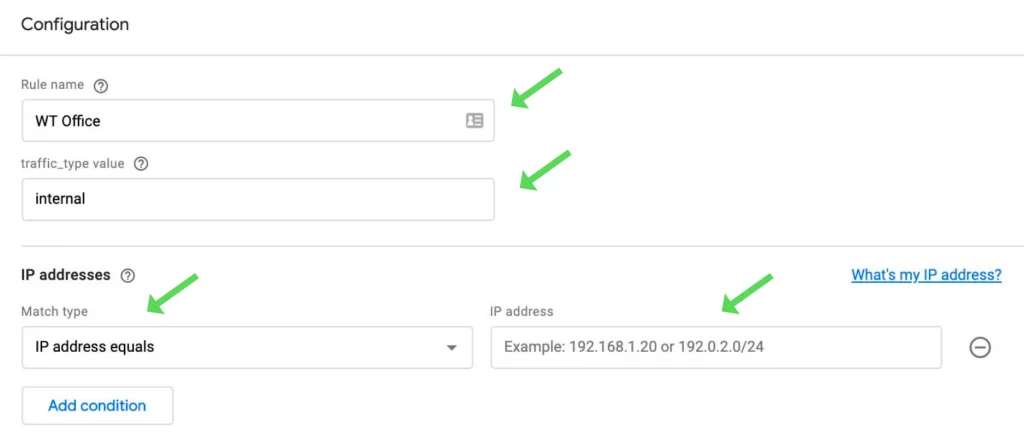
Note: traffic_type value should be “internal”, for IP addresses, the match type should be “IP address equals”.
With data filters in data settings, the filter details don’t require changes with a standard IP exclusion. However, we have 3 options in “Filter State” that are new with GA4:
- Testing: the filter doesn’t permanently change the data but can be identified with the dimension name “test data filter”.
- Active: the filter permanently changes the data.
- Inactive: The filter isn’t considered for processing the data.

Note: Testing can be selected if you want GA4 to consider the data but not to permanently change it. When testing is selected, the data from the filter can be viewed in reports by using the “test data filter” dimension. This can be temporary to test your filter before activating it. If you are certain that the IP filter should be excluded permanently from the data, select “Active” as your filter state.
Final Considerations
By now, you should have a clear understanding of how to create a Google Analytics account and GA4 property.
Armed with this information, you’re ready to start using Google Analytics 4 to better understand your website traffic and make data-driven decisions to boost your business.
Interested in additional tracking opportunities and insightful reports? Drop us a line or reach out to us via email and a member of our team will be happy to support you with your analytics needs.